Saturday, 26 November 2011

:: Berry Good Ice Cream ::


Quick & Healthy Berry Ice Cream
:: Megann’s Kitchen ::

:: quick & healthy strawberry ice-cream ::

It was my son’s first Christmas & we were at a family gathering at a dear friend’s house. We were all sitting around after a delicious luncheon and bursting at the seams but still had room for something sweet on a hot summer’s day. I was talking to Louise across the table & I heard, “Oh look, he loves it!” and “How adorable!”.... To my horror I looked over to the dramatic scene of my husband feeding my son his first ever food.... ice cream. The look on my face must have been priceless & one of absolute shock as I was about to fall on the floor, but no one was paying attention to me, all eyes were on my baby with is face half planted into a cone of vanilla bean goodness. You’ve got to understand, only pristine breast milk had past my baby’s precious lips prior to this event. I had extreme anxiety thinking he was going to go into anaphylactic shock any moment, but had to reassure myself that there was a qualified doctor & nurse at the table ready to take action if needed. “Calm down” I told myself. “He is six months old, he will be fine” as he took another nose dive right down to the waffle cone. “Oh no.... he is going to die....” But sure enough, Gloria & Graeme both assured me that he would be OK, and you know what? He was.

And yes, ever since this day my son’s weak point has been, you guessed it, ice cream. After each meal he suggests it like it is a new idea that no one has ever thought of before. “Ice cream? Oooh! Ice cream!” he exclaims, trying to contain himself in his high chair. I feel I have cheated him with this one, as it is mostly berries & yoghurt, so I put some chocolate sprinkles on top. This Jamie Oliver inspired recipe is a must this summer for a quick dessert for both the big & little kids.


1 x 500g pack of frozen berries, I like strawberries
3–4 tablespoons runny honey

250g of natural or vanilla yoghurt
250g of vanilla ice cream
a few sprigs of fresh mint

ice cream cones (I use baby ones for the kids)


:: fresh strawberries from the market to go into the ice-cream ::
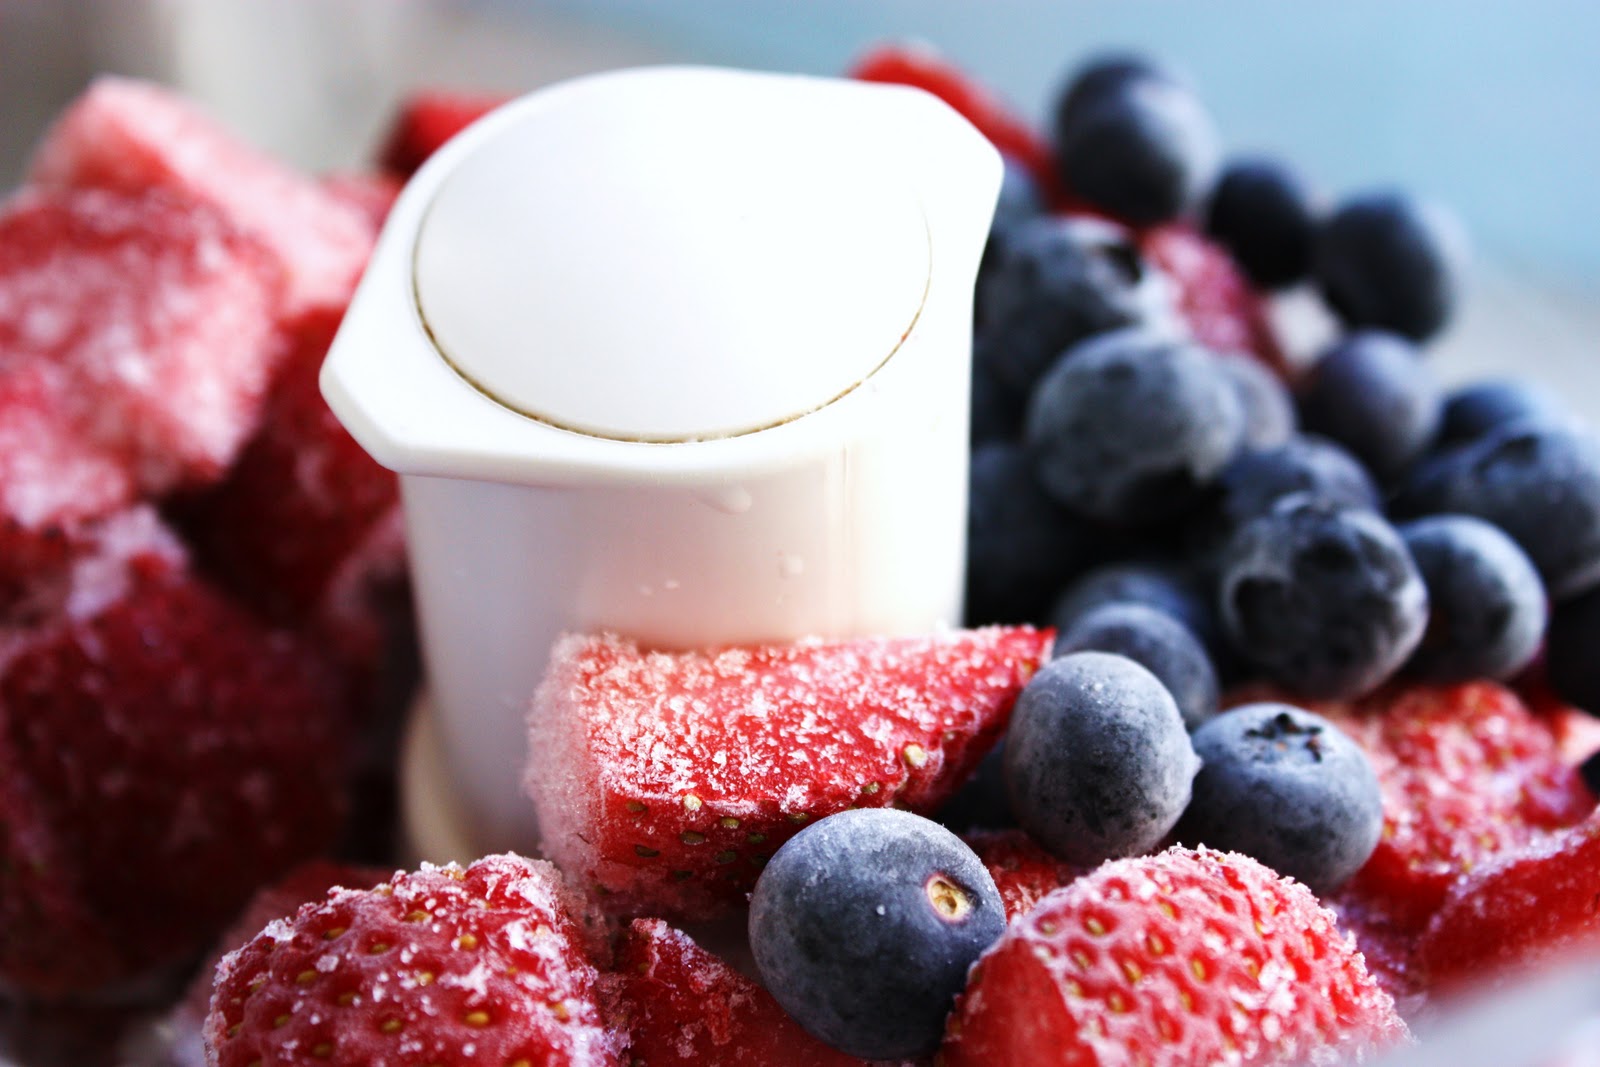
:: frozen berries ready to blend in the KitchenAid food processor ::
:: mr whippie or home made goodness? ::

Kitchen Notes
:: When keeping it in the freezer like I do, mix it with some actual ice cream so it is smoother & doesn't crystallise, but it is still oh so healthy! If serving straight up from blending, use 500g of vanilla yoghurt. Try it out & have fun!
:: I try & avoid fruit with large seeds, such as rasberries & blackberries, when blending in this quick method. To extract the seeds, boil the desired quantity down with 2Tbs of water in a pot on the stovetop until soft, then pass through a seive. Freeze the berry mixture & add to the blender next time.

Serve
:: If serving for adults, garnish with vanilla yoghurt or chocolate topping ladled over the ice cream & blueberries sprinkled on top.
:: When serving for the kids, I keep "mini" cones in the pantry & sprinkles, oh, & sometimes ice-magic!

:: freeze in a container in the freezer for ongoing berry delights ::
:: kids love helping with this one, great on a hot day! ::

Source
:: Ice-cream cones & Sprinkles: Shop at your local supermarket for mini, regular or waffle cones. Coloured Chocolate Sprinkles also available from your supermarket or cake decorating specialty stores.


I would also love to see your Megann's Kitchen Creations/photos of recipes that you have made on Megann’s Kitchen Facebook


Monday, 31 October 2011

:: Fasta Pasta ::

Prawn, Zucchini & Mint Pasta
:: Megann’s Kitchen ::


:: fresh prawn, zucchini & mint pasta ::


This is an incredible Tobie Puttock inspired pasta dish that I came across in a vintage delicious magazine & I have slightly tweaked & made it many, many times. It has beautiful fresh, light flavours & is perfect for a Spring or Summers day.
Now that I have started back at work & I have to think of some meals that are fast, fresh & tasty that the whole family can eat... & my word, this is one of them!

My toddler loves it & tonight even asked for seconds! “Moooooorrrree?” he pleaded, holding up his bowl, very much like the boy from the movie 'Oliver'. “What’s the magic word?” I asked. “Paleeeeeaasse?” he said, pushing the bowl out a little further. “Sure!” I answered excitedly. Usually my food gets thrown across the room, but tonight it was downed in two.

Tobie insists on fresh prawns, but in the world of fast meals, I buy the desired recipe quantities already weighed & still frozen from the fish mongers (kept out the back) so there isn’t any ‘double freezing’. This means I take out the package from the freezer the night before to defrost, ready for my meal the next day! 
Hats off to all the hard working parents out there, I hope you enjoy this delicious fast food as much as my family does.


400g pasta (tagliatelle, fettuccine, chitarra, spaghetti)
Extra virgin olive oil
2 zucchinis (courgettes), sliced lengthways into 3mm wide ribbons
1 garlic clove, finely chopped
400g large, uncooked prawn tails
Zest of 1 lemon
½ tsp crumbled dried chilli
1 anchovy fillets
100 ml dry white wine
45g butter
¼ cup mint leaves, torn
½ cup of flat-leaf parsley, finely chopped
Sea salt and freshly ground black pepper
Note: I have allowed for a lot of moisture content to come out the prawns when weighing.

Cook the pasta in a large pot of boiling salted water according to packet instructions & al dente. Drain.
In the mean time, heat 2 tablespoons olive oil in a large non-stick pan over a medium heat. Add the garlic and sauté for a couple of minutes until it is soft & fragrant. Add the prawns, chilli, anchovies & lemon zest & cook for about 1 minute or until the prawns just turn opaque. Add the wine & allow it to evaporate just a little. Add the zucchini ribbons & heat through. Add butter & drained pasta, tossing and stirring to combine all the ingredients. Add the mint and parsley. As soon as dish is completely heated through, remove the pan from the heat.
Season with ground black pepper & if necessary, a little sea salt (remember you have the salt from the anchovies!), & add a tablespoon or so of olive oil. Garnish with extra herbs. Serve immediately.


:: make sure to prepare your ingredients in advance ::

Kitchen Notes
:: Prepare all of your ingredients & measurements before you start cooking as it is a fast tempo once you start! The prawns, chilli, anchovies & lemon zest go in at the same time so I place them all in the one bowl.
:: If prawns are not available, use scallops or squid instead.
:: When we have fresh chillies in season, I use 1 red chilli chopped finely in lieu of the dried chilli.
:: If having a dinner party & wanting to impress with this simple dish, Tobie suggests to add zucchini flowers to the dish by tossing the torn zucchini flowers through at the last minute.


:: twirl your plate using tongs to create a tall nest of pasta, then eat!!! ::


Style
:: Whilst placing your pasta onto your plate with tongs, hold the pasta high above the dish, twirling the plate underneath as you slowly move closer to get a nice, high placement of a pasta nest. Finish with a few extra prawns, mint leaves, light zesting of lemon rind & for people who like spice, a little extra chilli.


:: my zyliss julienne peeler- so fast in the kitchen ::

Tools
:: I absolutely love my Zyliss Julienne Peeler. It is perfect for this kind of dish! I usually get two large zucchini’s & peel them with the Zyliss Julienne Peeler, leaving the core, as the seeds really don’t allow it to have enough structure. It is so quick & easy to create a big bowl of evenly sliced vegetables & for $10-$15, it is worth having in the drawer.
:: Note- So far in the world of blogging, I have not recieved any money for product endorsements. I shall continue to make sure that products that are on this blog come from the heart in order to help you at home.


:: the whole family sitting down to eat the one meal = bliss ::

Source
:: Zyliss Julienne Peeler is available from all good kitchenware outlets & online stores. Just a click away? Try Amazon.


Wednesday, 12 October 2011

:: Afternoon Tea Delight ::


Beautiful Buttermilk Scones
:: Megann’s Kitchen ::


:: buttermilk scones with home-made strawberry compote ::

I always thought the true test of being a good Australian wife was being able to make scones to perfection... the kind that actually rose high & were light & fluffy, that could win a blue ribbon at the Royal Easter Show. Well, I am not sure if these would win first prize & I don’t know what the CWA would think of my scones, but I have to say after quite a few years of striving toward the perfect scone I just adore the divine flaky texture of the buttermilk variety. I found this recipe in Stephanie Alexander’s Cooks Companion & once I tried it, I haven’t looked back. It is simple, easy to follow & has great results every time. Stephie's sister says you should have the scones timed so as your guests are walking up the path to your door you are taking them out of the oven and I tend to agree.
I have to say, along my road to scone perfection my husband has simply loved eating my trials, mishaps & I’ll admit it, darn rock hard scones. I think I have learned over time that the scone itself doesn’t have to be perfect for me to be a good Australian wife, just a happy husband & family. So, have a go at these simple scones as the end result doesn’t really matter, as long as they make you sweetly content as you eat them.

500 grams self-raising flour
2 tsp baking powder
1 Tbs caster sugar
100 gms chilled butter, chopped
300 ml buttermilk
Extra buttermilk, for brushing
Strawberry jam and whipped cream, to serve

:: process until fine breadcrumbs ::
  
Preheat oven to 220°C (425°F). Line one large baking tray with baking paper. In a food processor pulse your flour, baking powder, caster sugar & butter until it resembles fine bread crumbs. Tip the mixture into a large bowl & make a well in the middle & add the buttermilk. Stir the mixture as best you can. Tip the mixture out onto a lightly floured surface & gently knead until it comes together. Don’t worry if you leave a little of dry mixture behind. Using a floured rolling pin, roll out the dough until 3cm or just over 1 inch thick. Using a 6.5cm round cutter, press out the scones by twisting at the same time & place the scones closely together on the prepared tray. Press any leftover dough together & repeat. Brush the scones with buttermilk for a lovely golden colour & bake for 12-15 minutes.

Makes 10 x-large scones + one for the cook!


:: press & twisting out my scones from the dough ::

Kitchen Notes
:: By using a “twist” action as you press out your scones, you actually cut the dough instead of pushing them out, so it is easier for them to rise.
:: Another tip is they are ready when they sound hollow when tapped on!
:: If you don’t have a food processor, you can mix the butter & the flour together the way I learned as a young girl at school! Mix the flour, baking powder & sugar in a large bowl. Using your fingertips rub in the butter until no large lumps remain. It doesn’t have to be perfect, then continue with adding the buttermilk. Always, always run your hands under cold water to have chilled hands as to not melt the butter when using this method.
:: Don’t keep your scones for longer than 2 days, & if you have to reheat them, I warm them in the oven on about 150°C.
:: For slightly smaller scones, use a 5.5cm or 6cm cutter, this will also yield more.


:: brushing with buttermilk ::

Style: As scones are an old world tradition in Australia, pay homage to the woman of yesteryear & keep some vintage cutlery for special guests & afternoon teas. I guarantee that a lovely bone butterknife or intricate teaspoon will also be a conversation starter!


:: buttermilk scones ready to eat- fresh from the oven ::

Serve: I serve my scones warm; broken in half by hand with a side of butter, chantilly cream & home-made strawberry compote. Oh, heaven....

 
:: my husband tucking into scones with jam & cream ::


Source: Recipe modified, only slightly, from Stephanie Alexander's the Cook's Companion.
Purchase any book from amazon through this link This is a great Australian company. Includes free shipping.


I would also love to see your Megann's Kitchen Creations/photos of recipes that you have made on Megann’s Kitchen Facebook!


Related Posts Plugin for WordPress, Blogger...