Tuesday, 8 January 2013

:: Eating Fresh ::


Summer Vegetable & Goats Cheese Tart
:: Megann’s Kitchen ::


:: my favourite - a Summer Vegetable & Goats Cheese Tart ::

There is something magnificent about a golden homemade tart fresh out of the oven. It sings a change in seasons from the cold & wintery months to the beaming freshness that Spring & Summer carry to the kitchen. I also love how a tart like this one is so versatile in its guises – from an elegant vegetarian creation to a manly “egg & bacon pie”, it is really up to your imagination!
This Summer vegetable tart has become one of my favourite dishes to make for a light lunch or savoury snack when special guests come around. I was making it with the basic vegetable egg mixture, but once I had found that my local Growers Market stocked seasonal zucchini flowers & goats cheese at an affordable price, I couldn’t help but add these beautiful & edible enchantments to my tart.

to start

to fill
300 ml cream
4 large eggs
pinch of both sea salt & cracked pepper
1 medium zucchini (courgette), grated
1 medium carrot, grated
1 French shallot onion, halved & sliced lengthways
½ cup vintage cheese or cheddar, grated
4-6 zucchini flowers (optional) – stamens removed
80-100 grams goats cheese (optional)

Preheat oven to 180°C (350°F). Line a 24 cm round or 35 cm x 13 cm loose-bottomed tart pan with pastry following the Savoury Parmesan Pastry instructions, then bake blind at 180°C (350°F) for 10 minutes. Remove pastry weights & parchment paper then bake for another 5 minutes, until just cooked through. Remove.


Whilst your pastry is blind baking, prepare your filling. Lightly whisk together the cream & eggs, then season with the salt & pepper. Add the grated zucchini (courgette), carrot, hard cheese & sliced onion. Stir gently to combine. Spoon the mixture into the blind-baked pastry case. Gently place your desired quantity of zucchini flowers at an angle, tenderly opening up the flowers & pushing in some golden filling. Lightly crumble the goats cheese over the top of the tart, allowing it to fall into the spaces of the zucchini flowers.
Bake for 35-40 minutes, or until golden on top & set all the way through. Allow to cool until the tart is just warm or at room temperature.


:: your filling options are endless ::

Kitchen Notes
:: The best thing about this tart, is that it is very flexible with its ingredients. Don’t have zucchini flowers? Leave them out or place asparagus on top instead. No goats cheese? No problem, it tastes delicious anyway. No French onions? I gently panfry half a brown onion until sweet & tender, then add this to the mixture.
:: An impressive way to serve this tart for a morning/afternoon tea is to sprinkle a punnet of washed micro herbs over the top – wow!


:: made very simple in the KitchenAid food processor ::

Quick Kitchen
:: For speed, I grate my zucchini (courgette), & carrot in the food processor, but you can also use a simple box grater.
:: No time to make your own pastry? Keep some prepared pastry in your freezer, such as Careme’s Sour Cream Shortcrust Pastry or a Pampas Shortcrust Pastry (not the low fat option).


Little Larder
:: With any leftover mixture & pastry, I add some ham & to the basic egg mixture and make baby quiches in a muffin tin, which both my son & husband adore. They also freeze well for lunchbox or picnic treats.

:: a golden tart with golden zucchini flowers ::
:: this is the perfect summer meal for the ones you love ::


Enjoy this tart as much as we do here in Megann's Kitchen! 


:: Savoury Pastry Deliciousness ::


Shortcrust Parmesan Pastry
:: Megann’s Kitchen ::

:: a beautiful shortcrust parmesan pastry - blind baked & ready to be filled ::

I am not really sure where I found this recipe - but when it comes to a savoury pastry, this recipe is the best. I use it for all quiches & savoury tarts as it has a beautiful flavour & flaky finish. The parmesan cheese & pepper flecks through the pastry & adds a lovely depth to a simple recipe.

1 ½ cups plain flour
125g butter, chopped
¼ tsp ground pepper
½ cup finely grated parmesan
¼ to cup of chilled/iced water

Place the flour, butter, parmesan & pepper in a food processor. Pulse in the food processor until the mixture resembles fine breadcrumbs. Whilst blending, add the chilled water until the mixture comes together. When the mixture just combines into a ball (see picture), stop the processor & form a disc in your hands. Wrap in cling wrap & chill in the refrigerator for 1 hour


:: rolling out your dough onto cling wrap makes transferring the pastry easier ::

Preheat oven to180°C (350°F). On a large sheet of cling wrap, lightly flour the surface & roll the pastry until it is 3-5mm thick. With the cling wrap still attached to the pastry, carefully lift & flip, lining a greased 28 cm loose-bottomed tart pan with pastry, then trim with the heal of your hand. Chill for 10 minutes in the freezer or 20 minutes in the fridge. Remove the cling wrap, prick the pastry with a fork then line with parchment paper & fill with pastry weights.
Bake blind at 180°C (350°F) for 10 minutes. Remove pastry weights & parchment paper then bake for another 5 minutes, until just cooked through. Reset your oven to your desired temperature for recipe filling. 


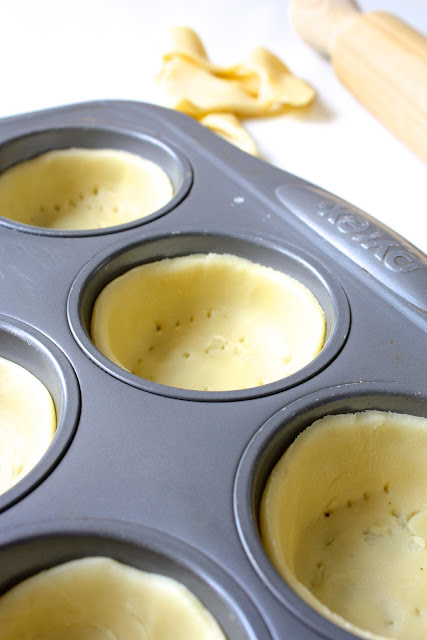
:: why not make mini quiches with any leftover dough? ::


Kitchen Notes
:: As it is a loose bottom tin, I like to place it on a tray to remove & place back in the oven with ease. This way there is no chance of you accidently breaking the crust of your pastry!
:: Don’t skip the resting/chilling process! It is essential to stop the shrinkage of your pastry.
:: I always roll my pastry onto a large piece of cling wrap. This helps a great deal when transferring to your desired baking tin.
:: In lieu of pastry weights, you can use uncooked rice, dried beans or even small, clean polished pebbles.
:: I have also made this pastry up to 3 days in advance, simply keeping it chilled in the refrigerator as a rolled ball, double wrapped in cling wrap.
:: Remember, quick hands! Especially in a warm room- you don’t want the butter to melt.
:: Keep the remainder of the pastry for savoury biscuits or styling accents to your tart/pie.

:: simply cut with a large cookie cutter or glass & place into a muffin tin - easy! ::


Please enjoy this pastry recipe, it's one of my favourites!


Tuesday, 18 December 2012

:: Not the Gumdrop Button... ::


Meg’s Vanilla Bean & Gingerbread Cookies
:: Megann’s Kitchen ::


:: gingerbread men & rudolf reindeer - two ways ::

I have fond holiday memories of Gingerbread Houses growing up. It wasn’t something my mum made, however family friends would sometimes make the most amazing gingerbread houses at Christmas time that I admired with wonder, also a watering mouth. The kids would all demolish it together with squeals of delight… eating the gumdrop lolly features & hardened icing first, of course!


Strangely enough, it was also going to Pizza Hut in the big city of Albury (an hours drive from where we lived) & always getting a gingerbread man for the ride home. Back then, I didn’t really like the foreign ginger taste in a cookie, but grew to love the spiced sweetness that you encounter with this special cookie. I would eat the icing with sprinkles off first, changing the colour of my face, then follow onto the cookie. Yum.

:: my favourite gingerbread man copper cookie cutter ::

Now that I have a child of my own, I would also like him to have the same fond recollections of Gingerbread at special occasions. Each birthday I have made him this recipe & now we are making Christmas Cookies in festive shapes for him to put icing “squeeze” on to & to decorate with friends. I am yet to attempt a Gingerbread House, but the next Christmas that we have at our house, you can bet on it!


Ginger Cookie Recipe
125g butter, softened
cup brown sugar
cup golden syrup
1 egg, lightly beaten
1 tsp of vanilla bean paste or seeds of 1 vanilla bean
2 cups plain flour
cup self raising flour
1 Tbs ground ginger
1 tsp bicarbonate soda

Preheat oven to 180°C (350°F). Prepare 3 cookie trays with baking paper. Note: Make sure they can also fit into your freezer. Use an electric mixer to beat the butter, sugar, vanilla & golden syrup together until pale & creamy. Add the egg gradually & beat until combined. Add the flours, ginger spices, bircarb soda & place your mixer on slow until just combined. Turn out onto a floured surface & knead until smooth, for about 1-2 minutes.
Take off one of your baking papers from a cookie tray. Roll out approximately a third of the dough on the baking paper until about 5mm (1/4 inch) thick. Lift the paper & place onto your baking tray & put into the freezer for 10 minutes to chill, or until firm enough to cut. While this is chilling, repeat the process & roll out some more dough to place in the freezer. 
Carefully lift the paper of chilled rolled gingerbread off the tray & press out your shapes. Cautiously place them onto a cookie tray with baking paper underneath. Place into the oven while the dough is still cool & bake in oven for 10-12 minutes or until lightly golden. 
Cool on trays then transfer to a cooling rack. 
Ice with Megann's Basic Royal Icing if desired.

Store
:: In an airtight container for up to 2 weeks.


:: golden syrup goodness ::
:: about to mix together - soft butter & sweeteners ::
  
Kitchen Notes
:: For Christmas I add a little bit of Christmas with my spices: such as Cinnamon, Nutmeg or Allspice. eg- 1½  tsp dried ginger & ½ tsp of mixed Christmas spice for this mixture quantity. Be sure to taste the dough - depending on the age of your spices they will have different intensities.
:: If you find that your cookies are creating crease like cracks in the top, it means your mixture is too dry. Try one of two solutions: whilst on the baking tray, place your cut out cookies back into the freezer to seize the cookie dough once again before baking. A fiddly, yet more effective, solution is to place the dough back into your mixing bowl, add more moisture (such as milk) to your mixture & combine on a slow speed with electric beaters.
:: For gifts, birthdays & special occasions, I place the gingerbread cookies into a cello bag & tie it with a matching ribbon – what a great way to make a simple cookie a little more presentable.


:: dry ingredients ::
:: delicious dough - ready to be rolled ::
:: rolling out to the perfect thickness - then into the freezer ::

Quick Kitchen
:: I have prepared the dough up to two days in advance, keeping it well covered in cling wrap in the fridge. Simply take the dough out of the fridge & sit on the bench top at least an hour before rolling. I find that it does produce a dryer dough, so make a more “wet” batch if this is your intention. Always check the consistency of the mixture before baking to prevent cracks (see above in kitchen notes).
:: I also use Queens Vanilla Bean Paste for my cookies, available from all good supermarkets in the baking section.

:: decorating Christmas fun with coloured Royal Icing ::
:: "mummy & me" - decorating efforts ::

Little Larder
:: When making this recipe for the kids, I halve the amount of the dried ginger ingredient so there is only a hint of the spiced flavouring. They find this non-offensive & more enjoyable. If you are also tentative about ginger, add it in 1 tsp amounts & taste the dough as you go.
:: For the kids to decorate the cookies, see my basic Royal Icing Recipe & Little Larder tips.


:: just some of a double batch - before being decorated with my Royal Icing ::

Recipe Doubled for birthdays, gifts & guests
250g butter, softened
cup brown sugar
cup golden syrup
2 eggs, lightly beaten
2 tsp of vanilla bean paste or seeds of 2 vanilla beans
4 cups plain flour
cup self-raising flour
2 Tbs ground ginger
2 tsp bicarbonate soda


:: matching my cookies to a birthday invite - by Sajaro Occasional Stationary ::

:: Merry Christmas to everyone - love Megann's Kitchen ::

Merry Christmas & a Happy New Year to everyone who reads & follows Megann’s Kitchen – your loyal support makes this adventure so rewarding… THANK YOU ALL!!!


Related Posts Plugin for WordPress, Blogger...